

Key Takeaways
- R-value measures insulation's resistance to heat flow - higher values mean better thermal performance.
- Most U.S. attics need at least R-38, and colder climate zones may require R-60 or more.
- Ventilation and air sealing are just as important as the insulation material itself.
- Some insulation types - particularly spray foam - require licensed installation.
- Existing insulation should be inspected for moisture damage or pest intrusion before adding new layers.
Why Attic Insulation Matters
Heat moves toward cold - always. In winter, warmth generated inside your home rises and escapes through the roof. In summer, radiant heat from a sun-baked roof pushes downward into your living spaces. Attic insulation slows both processes, reducing the workload on your heating and cooling system and improving comfort throughout the house.
The attic is the single greatest source of heat loss in most American homes, yet it's also one of the most straightforward areas to address. Unlike electrical or structural work, adding attic insulation is a project many homeowners can handle themselves - provided they understand the materials, the requirements, and the limits of DIY work.
For a broader picture of home upkeep that protects your investment, see our guide to routine home maintenance. Insulation fits naturally into a seasonal maintenance rhythm and pairs directly with how your heating system performs - something worth understanding if you're comparing forced air vs. radiant heat systems.
Understanding R-Values
R-value is the standard measure of an insulation material's resistance to heat flow. The higher the R-value, the slower heat moves through the material. R-values are additive - if you have R-19 already in place and add R-19 more on top, you end up with roughly R-38.
The U.S. Department of Energy divides the country into climate zones, each with recommended minimum R-values for attics. In warmer southern climates (Zone 2), R-38 is commonly the target. In colder northern climates (Zones 6-7), R-60 is often recommended. Check your local building department or the DOE's zone map to confirm what applies to your area.
R-38 to R-60
Recommended attic R-value range for most U.S. climates
According to the U.S. Department of Energy's climate zone recommendations for existing homes.
~15%
Estimated share of home heating/cooling loss through the ceiling and attic
The DOE identifies attics as one of the primary pathways for thermal loss in typical American homes.
2-3 inches
Minimum air gap required above soffit baffles
Building science guidance recommends maintaining this clearance to preserve proper attic ventilation.
For a deeper look at what these numbers mean in practice - including ventilation ratios and vapor barriers - our article on attic insulation and ventilation explained decodes the specifics.
Types of Attic Insulation
Choosing the right material depends on your existing insulation, attic structure, budget, and whether you plan to do the work yourself.
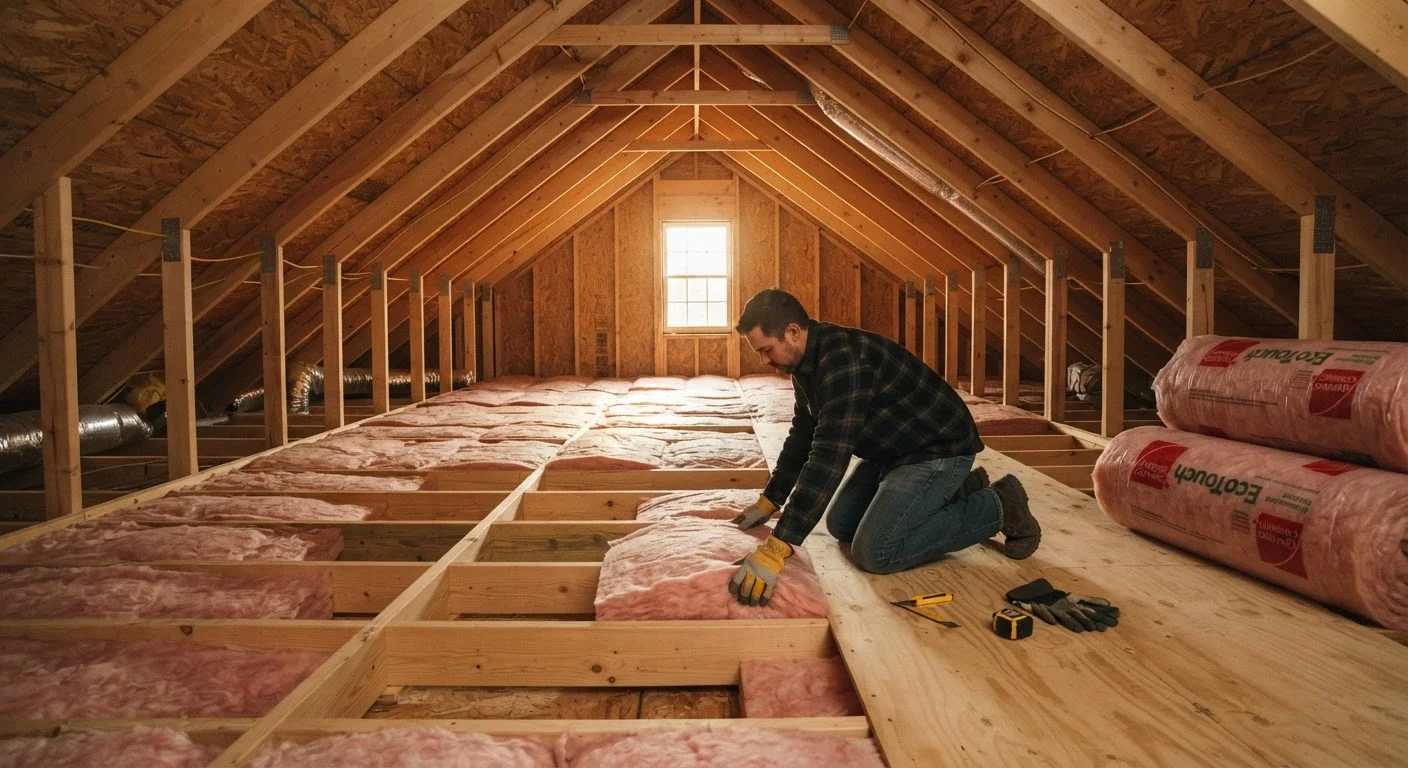
- Fiberglass batts: Pre-cut blankets of spun glass fiber. Easy for DIYers to handle, widely available, and suitable for unobstructed joist bays. Wear a respirator and long sleeves - fiberglass irritates skin and lungs.
- Blown-in fiberglass or cellulose: Loose fill blown in with a machine, ideal for topping up existing insulation or covering irregular spaces. Cellulose is made from recycled paper treated with fire retardant; it settles over time, which should be factored into initial depth.
- Spray polyurethane foam: Provides both insulation and air sealing in one application. Two-pound closed-cell foam delivers high R-value per inch but must be installed by a licensed professional due to chemical hazards during application and local code requirements.
- Rigid foam boards: Used mainly in specific situations - like insulating a cathedral ceiling or the underside of roof decking - rather than as a primary attic floor solution.
Before buying insulation, measure your existing depth at multiple points across the attic floor - insulation often compresses or settles unevenly over time, so one spot rarely tells the whole story.
Accurate measurement prevents buying too little material and ensures you meet your target R-value consistently across the entire attic floor.
Seal attic bypasses - gaps around recessed lights, plumbing stacks, and top plates - with caulk or canned spray foam before laying any new insulation; this step delivers more performance per dollar than adding extra insulation depth alone.
Air movement carries far more heat than conduction does, meaning unsealed gaps can negate a significant portion of the insulation's thermal benefit.
Assessing What You Already Have
Before buying any material, go into the attic and take stock. Bring a flashlight, a tape measure, and a respirator mask. Measure the depth of existing insulation between the joists and identify the material type. A rough guide: fiberglass batts at 6 inches yield about R-19; cellulose at the same depth is slightly higher.
Look for these warning signs before adding anything on top:
- Staining, clumping, or wet spots that indicate moisture intrusion
- Evidence of rodent nesting or pest activity
- Old vermiculite insulation - a grayish, pebble-like material that may contain asbestos and requires professional testing before disturbance
- Missing or damaged soffit baffles (the channels that keep vents clear near the eaves)
If you find moisture damage, identify and fix the source before insulating. Adding new material over wet insulation traps moisture and can lead to mold or structural damage.
Ventilation and Moisture Control
Insulation and ventilation work as a system, not independently. An attic needs airflow to prevent moisture buildup - warm, humid air from living spaces rises into the attic and, without adequate ventilation, condenses on cold roof decking. Over time, that moisture rots wood and promotes mold growth.
The standard guidance calls for one square foot of net free vent area for every 150 square feet of attic floor space, split between low intake vents (soffits) and high exhaust vents (ridge or gable). When insulating, never block soffit vents - install baffles to maintain the airflow channel from the eave to the ridge.
Never Block Soffit Vents
Soffit vents at the eaves are the intake side of your attic's ventilation system. Covering them with insulation - even partially - traps moisture and heat, accelerating roof deck deterioration. Always install rigid baffles (also called rafter vents or insulation baffles) before blowing in or placing batts near the eaves.
Air sealing - closing gaps around light fixtures, plumbing penetrations, and the attic hatch - should be done before adding insulation. Every unsealed gap is a pathway for warm, moist air, which undermines the insulation's effectiveness and contributes to moisture problems.
DIY vs. Hiring a Professional
Adding blown-in or batt insulation to an accessible attic floor is one of the more manageable DIY home projects, assuming the attic is structurally sound and free of hazards. Hardware stores often loan or rent blowing machines when you purchase a minimum quantity of loose-fill material.
However, certain situations call for a licensed insulation contractor:
- Spray foam installation of any kind
- Suspected asbestos or vermiculite presence
- Significant moisture damage requiring remediation
- Attics with knob-and-tube wiring, which may have code implications for covering with insulation
- Cathedral or sloped ceilings where access and vapor management are complex
When evaluating contractors, ask for written estimates that specify R-value, material type, and installation method. Verify licensing and insurance, and check whether a permit is required in your municipality - requirements vary by jurisdiction. This kind of code-sensitive project shares some complexity with work like finishing a basement, where local regulations significantly shape what's allowed.
Common Mistakes to Avoid
Even well-intentioned insulation projects can backfire. Watch out for these frequent missteps:
- Blocking ventilation: Piling insulation against the eaves without baffles cuts off airflow and causes moisture problems.
- Skipping air sealing: Insulation slows heat transfer; it doesn't stop air movement. Seal gaps first for maximum benefit.
- Ignoring the attic hatch: A poorly insulated hatch is a significant thermal weak point. Add rigid foam board and weatherstripping to the hatch door itself.
- Using the wrong R-value: Under-insulating saves money upfront but leaves performance on the table. Match your climate zone's recommendation.
- Disturbing hazardous materials: If you're unsure about what's in existing insulation, have it tested before proceeding.
For ongoing home maintenance strategies that keep problems from compounding, the Home Maintenance hub covers seasonal checklists and system-by-system guidance.
This article is for general informational purposes only. Always consult local building codes and, where applicable, a licensed professional before beginning insulation work in your home.